
{:de}
Vertikales Loadbalancing aktivieren
- Virtual Apps and Desktops Remote PowerShell SDK installieren: https://www.citrix.com/downloads/citrix-cloud/product-software/xenapp-and-xendesktop-service.html
- Citrix PS-SDK Mogule laden und Citrix Cloud Login durchführen:
asnp citrix*Get-XDAuthentication
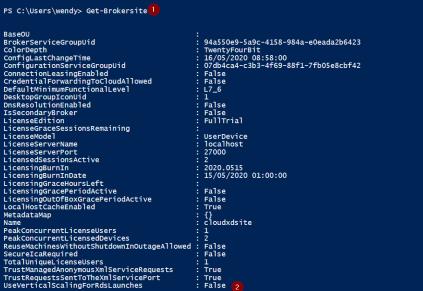
- Aktuelle Site-Konfiguration prüfen („UseVerticalScalingForRdsLaunches“):
Get-Brokersite
- Vertikalen Lastausgleich aktivieren
Set-Brokersite -UseVerticalScalingForRdsLaunches $true
Get-Brokersite sollte dann so aussehen:

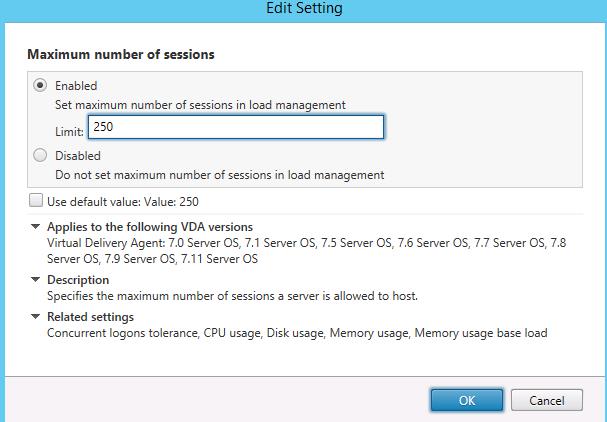
Damit nach dem Aktivieren auch was passiert muss man noch passende Policies bauen.
Ohne angepasste „Load Policies“ meldet ein „Citrix Server“ erst bei 250 gleichzeitigen Benutzern „Volllast / 10.000“.
Lastindex per PowerShell anzeigen:Get-BrokerMachine | Select DNSName, LoadIndex
Natürlich haben CPU, RAM etc. auch Einfluss auf den Server Load, welcher ebenfalls per Citrix Richtlinien gesteuert werden kann.
{:}{:en}
How to enable vertical load balancing
- Download and install the ‚Virtual Apps and Desktops Remote PowerShell SDK‘: https://www.citrix.com/downloads/citrix-cloud/product-software/xenapp-and-xendesktop-service.html
- Load the Citrix Remote SDK Module and login to yout Citrix Cloud account:
asnp citrix*Get-XDAuthentication
- Examine the current configuration („UseVerticalScalingForRdsLaunches“):
Get-Brokersite
- Enable vertical load balancing
Set-Brokersite -UseVerticalScalingForRdsLaunches $true- Check with
Get-Brokersitethat ‚UseVerticalScalingForRdsLaunches‘ is set to ‚true‘:
Now all new user connections get brokered to the same server VDA until this server reaches ‚maximum load‘.
By default the Citrix Policy is set to a maximum number of sessions of 250 per server. So be careful and change that to a proper value before activating vertical load balancing.
Get the load index via PowerShell:Get-BrokerMachine | Select DNSName, LoadIndex
{:}